How Do You Chalkboard Paint a Picture Frame: Easy Guide
Imagine transforming a simple picture frame into a versatile piece of art that reflects your creativity. How do you do that?
With chalkboard paint! This fun and easy project allows you to customize your frame with doodles, notes, or even seasonal decorations. You might be wondering, how do you chalkboard paint a picture frame without making a mess or ruining it?
Don’t worry; you’re about to discover simple, step-by-step techniques that ensure a smooth and professional finish. Get ready to dive into a world where your picture frame becomes a canvas for endless expression. Keep reading to unlock the secrets to perfecting this unique art form and unleash your inner artist!
Materials Needed
Creating a chalkboard picture frame is a fun and easy project. Gather the right materials to ensure a successful outcome. The right tools and supplies make the process smooth and enjoyable.
1. Chalkboard Paint
Start with high-quality chalkboard paint. It ensures a smooth finish. Choose a color that suits your style. Black and green are popular choices. These colors create a classic look.
2. Paintbrush Or Foam Brush
Select a brush that suits the frame’s size. A foam brush works well for even coverage. It helps avoid streaks. Choose a brush with soft bristles for a smooth finish.
3. Sandpaper
Sandpaper prepares the frame’s surface. It removes old paint or varnish. Use fine-grit sandpaper for a smooth surface. Make sure the frame is clean and smooth.
4. Painter’s Tape
Painters tape protects areas from paint. It ensures clean edges. Use it to cover parts you don’t want painted. This helps achieve a neat finish.
5. Cleaning Cloth
Clean the frame before painting. Use a soft cloth to remove dust. A clean surface ensures better paint adhesion. This step is crucial for a polished look.
6. Chalk
Chalk is essential for a chalkboard frame. Use it to test the surface. Choose white or colored chalk. It adds versatility to your frame.
7. Protective Gloves
Wear gloves to keep hands clean. They protect from paint and dust. Choose disposable gloves for easy use. This keeps the process neat.
Preparing The Frame
Transforming a picture frame with chalkboard paint begins with preparation. This stage ensures a smooth and professional finish. A well-prepared frame guarantees better adhesion and durability. Let’s dive into the essential steps to get your frame ready for chalkboard paint.
Removing Glass And Backing
Start by removing the glass and backing from the frame. This protects these parts from paint splatters. Carefully set them aside in a safe place. Check if the frame has any clips or brackets. Remove them to prevent any obstacles during painting.
Cleaning And Sanding
Clean the frame thoroughly using a damp cloth. Remove any dust or dirt that may hinder the paint’s adhesion. Once cleaned, let it dry completely. Sand the frame gently with fine-grit sandpaper. This creates a rough surface for better paint grip. Wipe off any sanding residue before proceeding.
Choosing The Right Chalkboard Paint
Choosing the right chalkboard paint is key for a beautiful picture frame. It affects durability and appearance. With the right paint, you can easily write messages or draw designs. Your frame becomes functional and stylish. Let’s explore the types of chalkboard paint and color options available.
Types Of Chalkboard Paint
Chalkboard paint comes in various forms. The most common is liquid paint. You can apply it with a brush or roller. Spray chalkboard paint is another option. It provides a smooth finish. Ideal for intricate frame designs. Magnetic chalkboard paint adds functionality. It allows you to stick magnets on the frame. Perfect for photos or notes.
Color Options
Chalkboard paint is not limited to black. Many brands offer a range of colors. You can choose classic green or trendy gray. Bright colors like blue and red are available too. Match the paint to your room’s decor. Or create a bold contrast. The possibilities are endless.
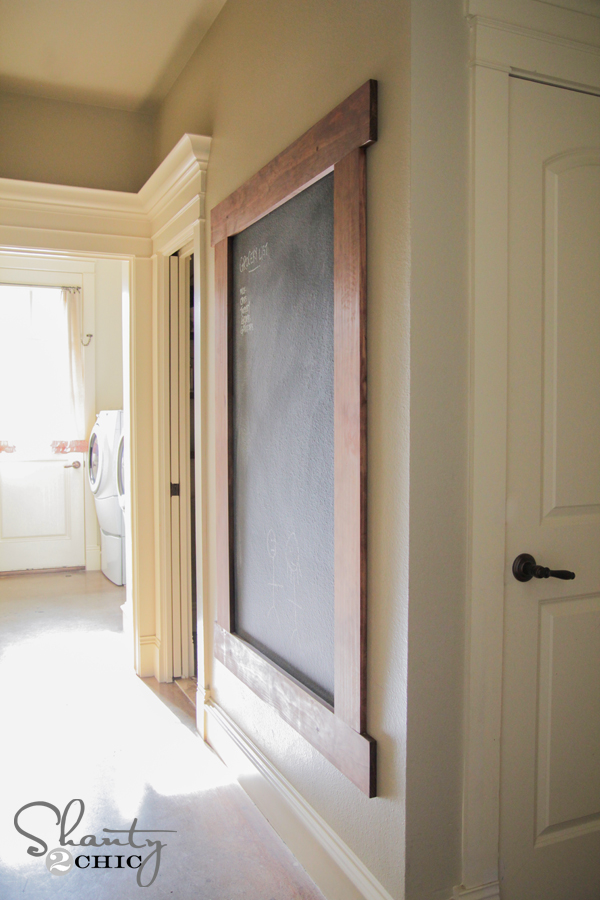
Credit: www.shanty-2-chic.com
Applying Chalkboard Paint
Transforming an ordinary picture frame into a chalkboard masterpiece is not only simple but also a creative way to personalize your space. Applying chalkboard paint is a straightforward process that can turn any frame into a functional piece of art. Whether you’re looking to jot down reminders or showcase your artistic flair, a chalkboard frame offers endless possibilities. Let’s dive into the steps to ensure your frame is ready for chalkboard paint and explore techniques to achieve a smooth, durable finish.
Priming The Frame
Before you start painting, priming your frame is essential. A good primer ensures that the paint adheres well, preventing peeling or chipping.
Start by cleaning the frame thoroughly. Dust and grime can affect the paint’s finish. Use a damp cloth to wipe it down, then let it dry completely.
If your frame is wooden, lightly sand the surface to create a rough texture. This helps the primer stick better. For metal or plastic frames, use a primer specifically designed for those materials. Apply a thin, even coat and let it dry as per the instructions on the primer can.
Painting Techniques
Once your frame is primed, it’s time to apply the chalkboard paint. Shake the paint can well before opening. This ensures an even mix of the ingredients.
Using a foam brush can help achieve a smooth finish. Foam brushes reduce visible brush strokes and are easy to control. Begin by applying a thin coat of paint, working your way from one edge to the other.
Allow each coat to dry completely before applying the next. You might need two to three coats for optimal coverage. Consider using a soft cloth to buff the surface lightly between coats for a professional look.
As you paint, think about how you’ll use the chalkboard frame. Will it hold messages or doodles? Imagine the possibilities and let this guide your technique for a personal touch.
Have you ever tried using chalkboard paint? What was your experience? Share your thoughts in the comments below!
Drying And Curing
Transform a picture frame with chalkboard paint easily. Begin by cleaning the frame thoroughly. Apply a smooth coat of chalkboard paint, ensuring even coverage. Let the paint dry completely before curing the surface. You can then add your creative touch with chalk.
Transforming a picture frame with chalkboard paint can be an exciting DIY project. It’s crucial to understand the drying and curing process to ensure the paint lasts and performs well. Without proper drying and curing, your masterpiece might not stand the test of time. Let’s dive into the details of drying time and curing process.Drying Time
After applying the chalkboard paint, patience is key. The drying time varies depending on factors like humidity and room temperature. Typically, you should allow at least 24 hours for the paint to dry. Don’t rush this step. Touching the surface too soon might smudge or ruin your work. If you live in a humid area, consider using a fan to speed up the drying. A quick tip: Test the paint’s dryness by gently touching a corner. If it feels tacky, give it more time.Curing Process
Once the paint is dry, curing is the next crucial step. Curing ensures the chalkboard surface is durable and ready for chalk. This process can take up to three days. During curing, avoid writing on the frame. Let the paint fully settle and bond with the surface. You might wonder, “Why wait so long?” Curing strengthens the paint, making it resistant to scratches and peeling. Consider this: Before using chalk, condition the surface with the side of a chalk stick. This primes the board, preventing ghosting effects. Wipe it clean with a dry cloth, and your frame is ready for creative expression. By understanding these steps, you set the stage for a successful project. Ready to transform your space?
Credit: www.shanty-2-chic.com
Reassembling The Frame
Transform a picture frame with chalkboard paint for a fresh look. First, remove the glass and clean the frame. Apply two coats of chalkboard paint, letting it dry between applications. Enjoy your new customizable frame!
Reassembling the frame after you’ve applied chalkboard paint is like putting the final pieces of a puzzle together. It’s the moment where all your efforts come to fruition, and you see your creative vision come to life. Whether you’re an experienced DIYer or trying this for the first time, reassembling is straightforward but requires a bit of patience and attention to detail. Let’s dive into the steps to ensure your frame looks polished and professional.Inserting Glass
Before placing the glass back into the frame, ensure it’s clean and free of smudges. A clean glass makes your chalkboard-painted frame look more refined. Use a microfiber cloth and a bit of glass cleaner to polish it. With the glass spotless, gently lay it into the frame. Ensure it fits snugly without forcing it. A proper fit avoids future breakage and gives the frame a seamless finish.Securing Backing
Once the glass is in place, it’s time to secure the backing of your frame. Place the frame face down on a flat surface, ensuring the glass doesn’t shift. Align the backing with the edges of the frame. If your frame uses clips or tabs, fold them back into place. This step is crucial as it keeps your glass and any inserted picture securely fastened. Consider using a small piece of masking tape on each corner if your frame doesn’t have built-in fasteners. This ensures the backing stays put and provides additional stability to the structure. Have you ever noticed how a well-secured frame feels more robust? It gives confidence that your hard work will stand the test of time. Taking these extra steps ensures your masterpiece is ready to hang or display proudly.Decorating And Using The Chalkboard Frame
Transforming a picture frame with chalkboard paint is simple and fun. Clean the frame, apply chalkboard paint evenly, and let it dry. This creates a unique, writable surface for notes or drawings.
Decorating and using a chalkboard frame can transform any room into a creative space. Imagine having the freedom to change your decor with just a few strokes of chalk. It’s not only fun but also offers practical benefits for organizing your daily life.Chalkboard Art Ideas
Unleash your creativity with endless chalkboard art ideas. Draw seasonal decorations to match the holidays or sketch motivational quotes that inspire you every morning. Try creating a weekly planner or a menu for your kitchen. Invite your kids to draw their favorite animals or let them practice their math skills. You could even use it for doodling during brainstorming sessions. The possibilities are as limitless as your imagination.Maintenance Tips
To keep your chalkboard frame looking fresh, regular maintenance is key. Clean it with a damp cloth to remove chalk residue, ensuring a crisp surface for your next masterpiece. Use a gentle cleaning solution if needed, but avoid harsh chemicals that might damage the paint. Store your chalks in a dry place to prevent them from breaking or becoming soggy. When was the last time you sharpened your chalks? A fine point makes a difference in detail work. Remember, a well-maintained chalkboard is always ready for your next idea. Have you ever thought about adding a magnetic strip to hold chalk or erasers? This small addition can enhance functionality and keep everything within reach. How will you make your chalkboard frame a centerpiece in your home?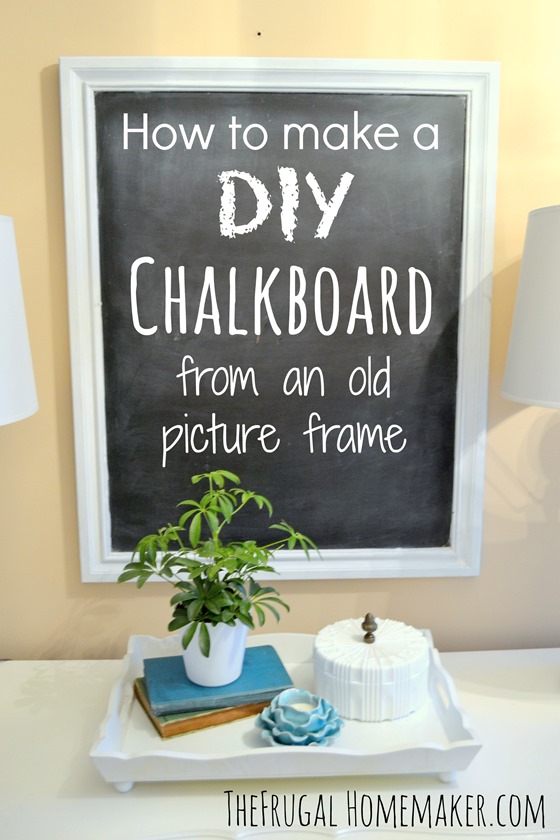
Credit: thefrugalhomemaker.com
Frequently Asked Questions
What Supplies Are Needed For Chalkboard Painting?
To chalkboard paint a picture frame, you need chalkboard paint, a brush or roller, sandpaper, painter’s tape, and a clean cloth. Ensure the frame is clean and free of dust. These supplies ensure a smooth application and a durable finish for your picture frame transformation.
Can You Use Chalkboard Paint On Any Frame?
Yes, chalkboard paint can be used on most frames. However, ensure the surface is clean and smooth. Sand down any rough areas before painting. Wooden, metal, and plastic frames are usually suitable. Always test a small area first to ensure the paint adheres well.
How Do You Prepare A Frame For Painting?
To prepare a frame, first clean it with a damp cloth to remove dust. Sand the surface lightly with sandpaper for better paint adhesion. Use painter’s tape to protect areas you don’t want painted. Ensure the frame is completely dry before applying chalkboard paint.
How Many Coats Of Chalkboard Paint Are Needed?
Typically, two coats of chalkboard paint are needed for a smooth, even finish. Allow the first coat to dry completely before applying the second. This ensures better coverage and durability. Follow the manufacturer’s instructions for specific drying times between coats for optimal results.
Conclusion
Creating a chalkboard picture frame is simple and fun. It adds a personal touch to your space. Just gather your materials and follow the steps. Remember, patience is key for a smooth finish. This DIY project is budget-friendly and creative.
Customize your frame with different colors or designs. Share your masterpiece with friends and family. They will surely admire your work. Enjoy the process and let your creativity shine. With practice, you’ll improve your skills. So, grab your brush and start painting today.
Your new chalkboard frame awaits!