Do I Need to Sand Window Sills before Painting: Essential Guide
Are you staring at your window sills, imagining a fresh coat of paint, but feeling unsure about the prep work involved? You might be asking yourself, “Do I need to sand window sills before painting?”
This is a crucial question, and the answer could make the difference between a smooth, long-lasting finish and a peeling, uneven mess. Imagine the satisfaction of a flawless paint job that transforms your space, elevating the entire room’s look. Before you dive into your next home improvement project, let’s explore why sanding might just be your secret weapon to achieving professional-quality results.
Keep reading to discover the simple steps that will ensure your window sills are perfectly prepped and ready for that stunning new color.
Importance Of Preparing Window Sills
Painting window sills can transform the look of a room. A fresh coat of paint brightens any space. But why is preparing window sills crucial? Proper preparation ensures paint adheres well. It prevents future peeling or chipping. This step enhances the durability of the paint job.
Importance Of Removing Old Paint
Old paint can hinder new paint from sticking. Scraping off old layers is essential. It provides a clean surface for new paint. This step avoids uneven finishes. It also helps in revealing any underlying damage.
Sanding For A Smooth Surface
Sanding creates an even surface. It removes rough patches and imperfections. This process ensures a sleek look once painted. Sanding also helps the new paint bond better. It reduces the risk of peeling.
Cleaning The Window Sills
Dust and dirt can affect paint adhesion. Cleaning sills before painting is vital. Use a damp cloth to wipe away debris. A clean surface offers a better painting base. It also enhances the final appearance.
Filling Cracks And Holes
Cracks and holes can ruin a paint job. Fill them with putty or filler. This step ensures a smooth finish. It prevents paint from settling unevenly. Filling gaps also improves the overall look.
Priming For Better Coverage
Primer helps the paint adhere effectively. It provides a uniform base color. Priming enhances paint durability. It prevents stains from showing through. Primer is a key step for an excellent finish.
Benefits Of Sanding Before Painting
Painting window sills can refresh a room. Before painting, sanding is vital. It enhances the paint’s appearance and longevity. Sanding removes imperfections and old paint, giving a smooth surface.
Benefits Of A Smooth Surface
Sanding creates a smooth surface. Paint adheres better to smooth surfaces. This prevents peeling and chipping. A smooth surface results in a professional finish.
Enhanced Paint Adhesion
Sanding improves paint adhesion. It removes dirt and grease. Clean surfaces help paint stick properly. This ensures the paint lasts longer.
Elimination Of Imperfections
Sanding eliminates imperfections. Old paint and rough spots disappear. This prepares the sill for painting. A flawless base leads to a better finish.
Improved Aesthetic Appeal
A well-sanded sill looks better. It gives a clean, neat appearance. Paint flows evenly over sanded surfaces. This adds to the beauty of the room.
Long-lasting Results
Sanding ensures durable paint. It prevents future damage. Paint stays vibrant and fresh. This saves time and money on repairs.
Types Of Window Sill Materials
Painting window sills can refresh your home’s look. But, different materials require different prep steps. Understanding your window sill material is key. Let’s explore common materials and their sanding needs.
Wood
Wood window sills are popular for their natural look. They need sanding to ensure paint sticks well. Sanding removes rough spots and old paint. Use fine-grit sandpaper for a smooth surface. This helps the paint adhere properly.
Metal
Metal window sills need a different approach. Sanding helps remove rust and old paint. Use medium-grit sandpaper for this task. A clean, sanded surface is vital for a smooth finish. Always clean the dust before painting.
Vinyl
Vinyl window sills are low-maintenance. They rarely need sanding before painting. Check for dirt or grease instead. Clean well with soap and water. Vinyl’s smooth surface usually holds paint without sanding.

Credit: harrisbrushes.com
Tools Required For Sanding
Painting window sills is a simple way to refresh a room. Before painting, sanding the surface is crucial. Sanding ensures the paint adheres well and looks smooth. The right tools make sanding easier and more effective. This section covers the essential tools for sanding window sills.
Sandpaper Grits
Sandpaper grits come in various sizes. For window sills, medium-grit sandpaper is ideal. It removes old paint and smooths rough areas. For finer smoothing, use fine-grit sandpaper. Always start with a coarser grit. Then, move to a finer grit for a smooth finish.
Sanding Blocks
Sanding blocks provide a firm grip. They help apply even pressure on the surface. They’re useful for flat areas and edges. Choose a sanding block that fits comfortably in your hand. Some blocks have replaceable sandpaper for convenience.
Electric Sanders
Electric sanders speed up the sanding process. They’re especially useful for larger surfaces. Choose a sander with adjustable speed settings. This allows control over the sanding intensity. Use electric sanders carefully to avoid over-sanding.
Steps To Sand Window Sills
Sanding window sills is an important step before painting. It ensures a smooth surface for the paint to adhere. Follow these simple steps for a perfect finish.
Cleaning The Surface
Start by cleaning the window sills thoroughly. Remove dust, dirt, and old paint. Use a damp cloth to wipe the surface clean. Let it dry completely before sanding.
Choosing The Right Sandpaper
Select the correct sandpaper for the job. Use coarse grit sandpaper for rough surfaces. Fine grit sandpaper works best for smooth surfaces. Ensure the sandpaper is suitable for wood.
Sanding Techniques
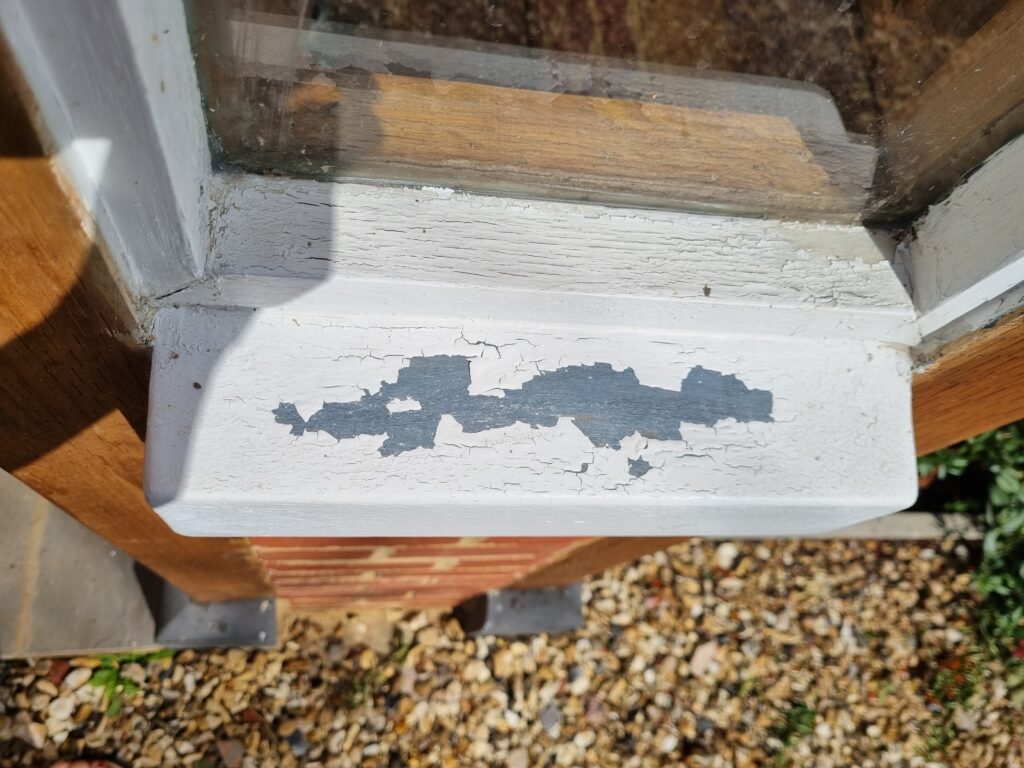
Use gentle, circular motions when sanding. Apply even pressure for a smooth finish. Sand along the grain of the wood. Avoid sanding too deeply. Check the surface regularly to see your progress.
Credit: www.reddit.com
Dealing With Damaged Window Sills
Dealing with damaged window sills can feel overwhelming. But, addressing them before painting is crucial. Damaged sills ruin the look and weaken the structure. Proper preparation ensures a smooth and long-lasting finish. Let’s explore how to repair and prepare these surfaces.
Repairing Cracks And Holes
Cracks and holes are common in older window sills. Begin by cleaning the surface with a damp cloth. Remove dust and debris. Use a putty knife to apply wood filler. Fill each crack and hole carefully. Smooth the surface with the knife. Allow the filler to dry completely. This step creates a solid base for sanding.
Sanding After Repairs
Once repairs dry, sanding is necessary. Start with medium-grit sandpaper. Sand the repaired areas gently. Focus on creating an even surface. This helps the paint adhere better. After sanding, wipe the sill with a clean cloth. Remove any dust left behind. This ensures a smooth, flawless finish when painting.
Alternatives To Sanding
Painting window sills can transform a room. Yet, sanding isn’t always necessary. Sanding can be time-consuming and messy. Luckily, there are alternatives to sanding. These methods can save you time and effort. Let’s explore some easy options.
Liquid Sandpaper
Liquid sandpaper offers a simple solution. It prepares surfaces without creating dust. Apply it with a clean cloth. Rub it on the window sill evenly. This process removes the glossy finish. It helps new paint stick better. Liquid sandpaper is easy to use. It works well on most surfaces. Read the instructions on the label. Follow safety guidelines for best results.
Adhesion Primers
Adhesion primers provide another alternative. They help paint stick to surfaces. No sanding required. Apply them directly to the window sill. They create a smooth surface for painting. Choose a primer suitable for the material. Some are designed for wood. Others work on metal or plastic. Adhesion primers are versatile. They enhance paint durability. They are easy to apply with a brush or roller.
Common Mistakes To Avoid
Sanding window sills before painting can prevent peeling and uneven surfaces. Many skip this step, leading to unsmooth finishes. A light sanding ensures better paint adhesion and a polished look.
When you’re sprucing up your home with a fresh coat of paint, window sills can often be overlooked. Yet, they play a crucial role in the overall look of a room. One common question that arises is whether you need to sand window sills before painting. While sanding is a key step, there are several pitfalls you can fall into during the process. Avoiding these mistakes can make your painting project smoother and more successful. Let’s dive into some of these common mistakes you should steer clear of.Skipping The Cleaning Process
Before you even think about sanding, you must clean your window sills thoroughly. Dust, dirt, and grime can interfere with the sanding process, leaving your sills uneven and your paint job looking less than perfect. Grab a damp cloth and wipe down the surface. You’ll be amazed at how much smoother the sanding goes afterward.Using The Wrong Sandpaper
Not all sandpapers are created equal. Choosing the wrong grit can lead to disastrous results. Too coarse, and you risk scratching the surface; too fine, and you might not remove the old paint effectively. Opt for a medium grit sandpaper, around 80 to 120, to get the job done efficiently. It’s a small detail, but it makes a big difference.Neglecting To Check For Damage
Damage on window sills can be subtle, but it must be addressed before painting. Small cracks or chips can become worse over time if not repaired. Running your fingers along the sill can help you detect any imperfections. Use wood filler to patch up these issues before you start sanding.Overlooking Primer
Once your sanding is complete, applying a primer is essential. It helps the paint adhere better and lasts longer. Skipping this step can result in peeling or uneven coverage. A good primer acts like a glue between the surface and the paint. Imagine your frustration when your freshly painted sill starts to chip within weeks. Don’t skip this step!Painting In The Wrong Conditions
Weather can play a huge role in your painting project’s success. Painting during high humidity or extreme temperatures can affect how the paint dries and adheres. Aim for a dry, moderate climate to ensure the best results. Have you ever painted on a rainy day, only to see your hard work drip away? Timing is everything. By avoiding these mistakes, you can achieve a flawless finish on your window sills, enhancing your home’s beauty. Now, what are your biggest challenges when tackling painting projects?Tips For A Smooth Finish
Painting window sills can refresh a room’s look. Achieving a smooth finish requires preparation. Sanding is a crucial step. It ensures paint adheres well and looks even. Follow these tips for the best results.
1. Choose The Right Sandpaper
Start with medium-grit sandpaper. Use 120 to 150 grit for removing old paint. This grit helps smooth uneven surfaces. For finishing, switch to fine-grit sandpaper. Use 220 grit to prepare for primer and paint. It ensures a sleek surface.
2. Clean The Surface Thoroughly
Dust and dirt can ruin your paint job. Clean the window sills before sanding. Use a damp cloth to remove debris. After sanding, clean again to remove dust. A clean surface ensures a smooth finish.
3. Use A Sanding Block
Sanding blocks offer better control. They help maintain even pressure. This prevents unwanted grooves or scratches. Sand in the direction of the wood grain. It provides a consistent and smooth surface.
4. Fill Imperfections
Check for cracks or holes in the wood. Use wood filler to repair them. Let it dry completely. Once dry, sand the area smooth. This step ensures the paint covers evenly.
5. Apply A Primer
Primer prepares the surface for paint. It seals the wood and enhances adhesion. Choose a primer suitable for your paint type. Apply with a brush or roller. Let it dry before painting.
6. Sand Between Coats
Sanding between coats ensures an ultra-smooth finish. Use fine-grit sandpaper after primer and each paint coat. Lightly sand the surface. Remove any imperfections or bubbles. Clean the surface before applying the next coat.
7. Protect Surrounding Areas
Use painter’s tape to protect walls and glass. It prevents accidental paint marks. Cover floors and furniture with drop cloths. This keeps your work area clean and neat.

Credit: www.homebuilding.co.uk
Frequently Asked Questions
Do I Need To Sand Window Sills Before Painting?
Yes, sanding window sills before painting is essential. It helps remove old paint, smooths the surface, and ensures better paint adhesion. Skipping this step can result in uneven paint and poor finish. Always use fine-grit sandpaper and clean the surface thoroughly before applying paint.
How To Sand Window Sills Effectively?
To sand window sills effectively, start with medium-grit sandpaper for rough surfaces. Then, switch to fine-grit for smoothing. Sand in the direction of the wood grain to avoid scratches. Clean the dust with a damp cloth before painting. This process ensures a smooth, even finish.
What Type Of Sandpaper For Window Sills?
Use medium-grit sandpaper (around 120-150 grit) to remove old paint. For smoothing, fine-grit sandpaper (around 220 grit) is ideal. This combination prepares the surface well for painting. Always ensure to remove dust after sanding for a clean finish.
Can I Paint Without Sanding Window Sills?
Painting without sanding can lead to poor adhesion and an uneven finish. Sanding ensures the paint sticks better and lasts longer. It also smooths out any imperfections. For best results, always sand before painting, especially on surfaces with old paint or varnish.
Conclusion
Sanding window sills before painting is usually a good idea. It helps paint stick better. The surface becomes smooth and neat. You avoid future peeling or chipping. But, not all situations require sanding. If the old paint is smooth, you might skip it.
Always clean the sill first. Dirt can ruin the finish. Use sandpaper if needed for stubborn spots. Check the condition of your window sills. Decide based on their current state. Proper preparation leads to lasting results. Happy painting!