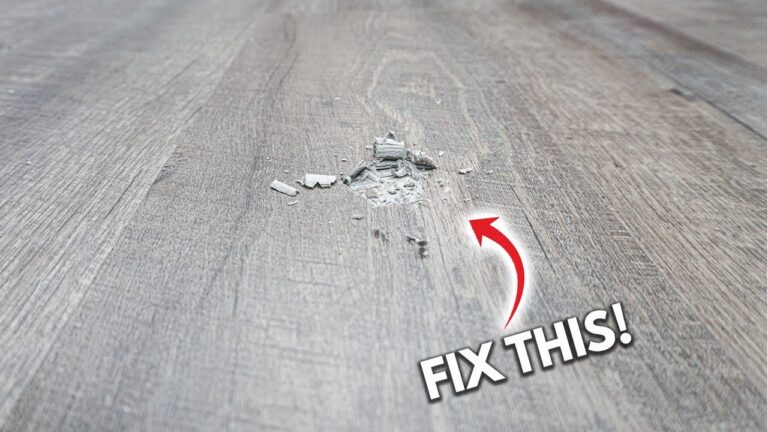
Can Vinyl Tiles Be Installed Over Linoleum? Discover How!
Are you staring at your old linoleum floor, wondering if it’s time for a change? You’re not alone.
Many homeowners face the same dilemma: How can you update your flooring without a complete overhaul? The answer might be simpler than you think. Imagine transforming your space with sleek, durable vinyl tiles, all without tearing up the existing linoleum.
Sounds appealing, right? But can vinyl tiles really be installed over linoleum? This question might hold the key to your next home improvement project. By the end of this article, you’ll have a clear understanding of the possibilities and the steps involved. Get ready to discover a cost-effective and stylish solution that could breathe new life into your floors.
Benefits Of Vinyl Tiles
Vinyl tiles have become a popular choice for homeowners looking to refresh their floors without the hassle of a complete overhaul. One major advantage of vinyl tiles is their ability to be installed over existing linoleum, making the process quicker and easier. But what makes vinyl tiles so appealing? Let’s explore the benefits that make them a top choice for many.
Durability And Longevity
Vinyl tiles are known for their strength and resilience. They can withstand heavy foot traffic, making them ideal for busy households. My neighbor installed vinyl tiles in her kitchen and, even after years of daily use, they still look as good as new. This durability means you won’t have to worry about frequent replacements, saving you time and money in the long run.
Variety Of Designs
The design options with vinyl tiles are seemingly endless. Whether you prefer a classic wood look or a modern geometric pattern, there’s something for everyone. You’re not just limited to one style throughout your home. Mix and match to suit different rooms and moods. This versatility allows you to personalize your space without breaking the bank.
Affordability
Vinyl tiles are a cost-effective flooring solution. Compared to other materials like hardwood or ceramic, they offer a budget-friendly option without sacrificing quality. During a recent renovation, a friend opted for vinyl tiles and was pleasantly surprised by how far her budget stretched. Why spend more when you can achieve a stylish look for less?
So, when considering an upgrade, ask yourself: do you want a floor that combines durability, variety, and affordability? Vinyl tiles might just be the answer you’re looking for.
Credit: notinggrace.com
Assessing Linoleum Condition
Examining the state of linoleum is crucial before installing vinyl tiles. Check for even surface and damage-free areas. Proper assessment ensures successful vinyl tile installation over linoleum.
Before you jump into installing vinyl tiles over linoleum, it’s crucial to assess the condition of your existing floor. Taking the time to evaluate the linoleum’s state can save you from potential hassles down the road. Let’s dive into the key areas you should examine:Checking For Damage
Start by inspecting the linoleum for any visible damage. Look for cracks, holes, or any signs of wear that might compromise the new flooring. A damaged surface can lead to uneven vinyl tiles, which isn’t just an aesthetic issue—it can become a tripping hazard. If you discover any damage, it’s wise to repair it before proceeding. You can use a linoleum patch kit for minor damages. However, if the damage is extensive, you might need to consider removing the linoleum entirely or consulting a professional.Ensuring Flatness
Next, check the flatness of your linoleum floor. Use a level to ensure the surface is even across all areas. Uneven floors can cause the vinyl tiles to lift or not adhere properly, leading to an unsightly finish. A simple way to test flatness is by using a long straightedge or a level tool across various points of the floor. If you notice any high or low spots, consider using a floor leveling compound to create a smooth surface. This step is vital for the longevity and appearance of your vinyl tiles.Cleaning Requirements
Before laying down vinyl tiles, ensure the linoleum is thoroughly cleaned. Dirt, dust, and grime can prevent the adhesive from sticking, leading to issues down the line. A clean surface is essential for a successful installation. Use a gentle cleaner and a scrub brush to remove any stubborn dirt. Make sure to dry the floor completely after cleaning. Moisture can interfere with the adhesive process, so take your time to let it air out properly. Have you ever rushed through a project only to face issues later? Taking these steps seriously can make all the difference. Now you’re better equipped to create a flawless finish for your new vinyl floor.Necessary Tools And Materials
Installing vinyl tiles over linoleum requires specific tools and materials. Essential items include a utility knife, measuring tape, adhesive, and a notched trowel. Don’t forget a straightedge and a roller for a smooth finish.
Vinyl tiles offer a modern touch to floors. Installing them over linoleum is possible. First, gather the necessary tools and materials. This ensures a smooth installation process. Proper preparation leads to better results. Here’s what you need.Tools For Installation
A tape measure is vital. It helps with accurate measurements. A utility knife is necessary for cutting tiles. A straightedge ensures even lines. A notched trowel is used for applying adhesive. Have a rubber mallet on hand. It helps press the tiles firmly.Types Of Adhesives
Choose the right adhesive for your project. Pressure-sensitive adhesive is popular. It allows for easy tile adjustments. Multipurpose adhesive offers strong bonding. It’s suitable for high-traffic areas. Ensure the adhesive is compatible with both vinyl and linoleum. This prevents future issues.Safety Equipment
Safety should always come first. Wear gloves to protect your hands. Use knee pads for comfort during installation. Safety goggles shield your eyes from debris. A dust mask is important. It prevents inhalation of dust particles. Always work in a well-ventilated area. This ensures a safe environment./can-you-tile-over-vinyl-floor-1822596-b0f2e6dd19854b2c830bab9193af728d.png)
Credit: www.thespruce.com
Preparation Steps
Installing vinyl tiles over linoleum can be a great way to update your floors without the hassle of removing old materials. But to ensure a smooth and durable finish, proper preparation is crucial. Each step you take will lay the foundation for a flawless installation. Let’s dive into the preparation steps necessary for success.
Cleaning And Drying Linoleum
Start by thoroughly cleaning the linoleum surface. Use a mild detergent and warm water to remove any dirt, grease, or stains. A clean surface ensures the adhesive bonds well.
After cleaning, make sure the linoleum is completely dry. Moisture can weaken adhesives, leading to peeling or bubbling. Try using a fan or open windows to speed up the drying process.
Repairing Uneven Surfaces
Uneven surfaces can lead to a less-than-perfect finish. Check for any bumps or holes in the linoleum.
If you find any, use a linoleum repair kit or floor patch to level them out. Investing time in smoothing the surface now will save you from headaches later.
Applying Primer
Primer acts as an intermediary layer, enhancing the adhesive grip between linoleum and vinyl tiles. Choose a primer suitable for vinyl installation.
Apply the primer evenly across the floor with a roller or brush. Allow it to dry completely before moving on to tile installation.
Have you ever thought about how a small preparation step can impact the whole project? Taking the time to clean, repair, and prime can make the difference between a job well done and a floor that needs constant fixes. As someone who learned this the hard way with a peeling tile disaster, trust me—these steps are worth it.
Installing Vinyl Tiles
Vinyl tiles can be installed over linoleum, offering a fresh look without removing the old flooring. Ensure the linoleum surface is clean, dry, and level before starting. Proper preparation ensures a smooth installation and a durable finish.
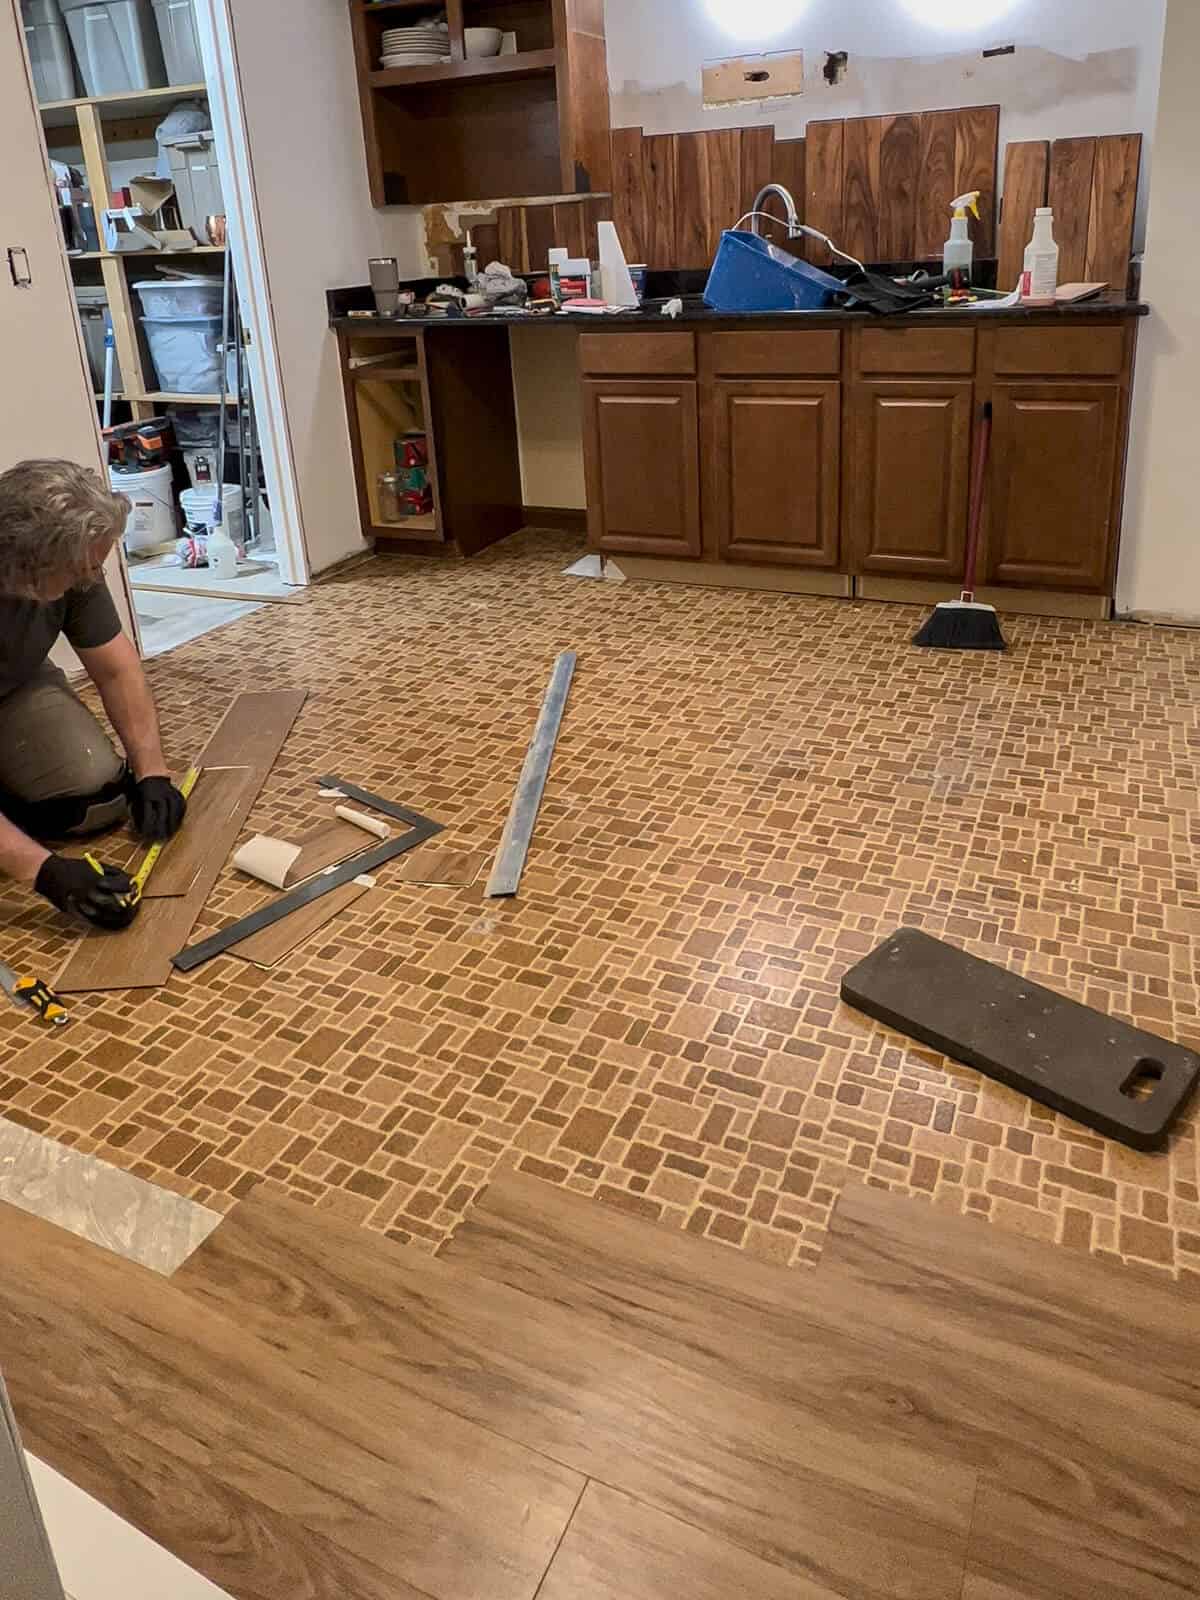
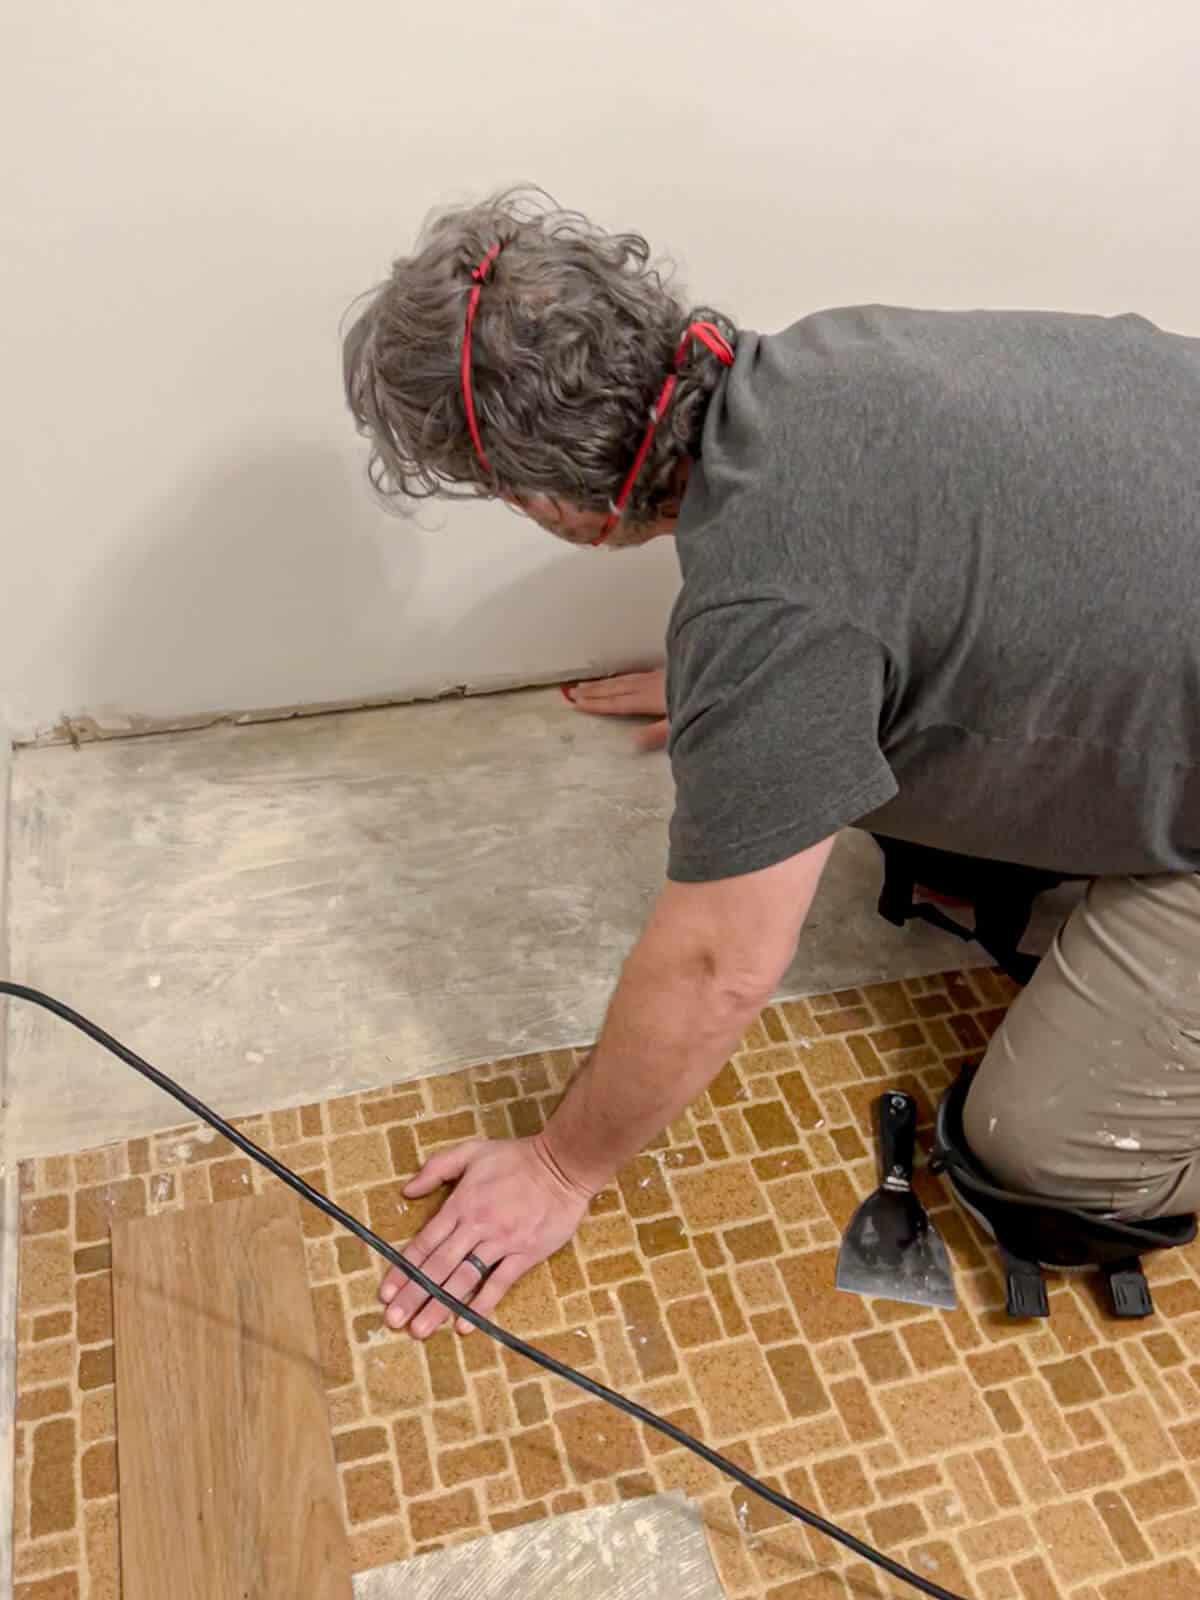
Installing vinyl tiles over linoleum can transform your floors with a fresh, modern look without the hassle of removing the existing flooring. This process is straightforward, but attention to detail is key. Whether you’re a DIY enthusiast or just looking to refresh your space, understanding the steps involved will ensure a seamless finish. Let’s dive into the essentials of measuring, cutting, aligning, and applying adhesive for your vinyl tiles.Measuring And Cutting Tiles
Accurate measurements are crucial. Begin by measuring the entire area where you plan to install the vinyl tiles. Use a tape measure for precision, noting down the dimensions. Once you have your measurements, mark the tiles accordingly. A sharp utility knife or a tile cutter can help you achieve clean cuts. It’s always a good idea to cut a few extra tiles, just in case. Have you ever found yourself needing just one more tile to finish a project? It’s better to be prepared.Aligning And Placing Tiles
Now, it’s time to align your tiles. Start from the center of the room and work your way out to ensure an even layout. This technique prevents awkward cuts and helps maintain symmetry. As you place each tile, press firmly to secure it in position. Ensure the edges meet neatly without gaps. Have you noticed how a slight misalignment can disrupt the entire look? Paying attention here makes all the difference.Applying Adhesive
Adhesive is the glue that holds everything together. Choose a vinyl-specific adhesive for optimal results. Apply it evenly across the surface, using a trowel for smooth distribution. Place your tiles immediately after applying the adhesive. This prevents it from drying and losing its effectiveness. Did you know that a delayed placement might weaken the bond? Quick action ensures the tiles stay put. Your floor is not just a surface—it’s a statement. Installing vinyl tiles over linoleum is a practical way to enhance your space with style and durability. Are you ready to take on this rewarding challenge?Finishing Touches
Vinyl tiles can be installed over linoleum, providing a fresh look without removing the old floor. Proper surface preparation ensures a smooth installation and enhances durability. Make sure the linoleum is clean, dry, and level for the best results.
When installing vinyl tiles over linoleum, the finishing touches are crucial to ensure a professional look and long-lasting results. You’ve put in the effort to lay each tile with precision, and now it’s time to perfect the details. These final steps will make all the difference, transforming your new floor from good to great.Sealing The Edges
Once your tiles are in place, carefully seal the edges. This prevents moisture from seeping underneath, which can cause damage over time. Use a high-quality silicone caulk to fill in the gaps along the walls and other fixed structures. A steady hand and patience are key here. A clean edge not only protects your floor but also gives it a polished look. Have you ever noticed how the smallest details can elevate a space?Cleaning The Surface
Before you can admire your handiwork, give the surface a thorough cleaning. Dust and adhesive residues can dull the appearance of your tiles. A damp mop with a mild detergent can work wonders, restoring the tiles’ shine. Avoid harsh chemicals that might harm the finish. Your floor is a reflection of your hard work; make sure it gleams.Allowing For Settling
It’s tempting to start using your new floor immediately, but allowing it to settle is important. Give the adhesive time to bond fully with the linoleum. A waiting period of at least 24 hours is recommended before placing heavy furniture or walking extensively on it. Think of this as an investment in durability. After all, you’ve put in the effort—why not ensure it lasts? Have you considered what a little patience might save you in future repairs or replacements? These finishing touches are not just chores—they’re the steps that ensure your project stands the test of time. What’s your favorite part of seeing a project through to its polished finish?Common Mistakes To Avoid
Installing vinyl tiles over linoleum seems easy. Yet, mistakes happen. These can lead to problems. Knowing the common mistakes helps. It ensures a smooth installation. Avoiding these errors saves time and money.
Improper Surface Preparation
Clean the linoleum surface thoroughly. Dirt and grime affect adhesion. Remove any wax or polish. Ensure the surface is flat. Use a leveling compound if needed. Uneven surfaces cause tiles to lift.
Inaccurate Measurements
Measure the area twice before cutting. Small errors can lead to gaps. Use a ruler or tape measure. Write down each measurement. Cut tiles carefully. Proper fit is crucial.
Skipping Adhesive Steps
Use the right adhesive for vinyl tiles. Apply adhesive evenly. Follow the manufacturer’s instructions. Do not skip this step. Without adhesive, tiles may not stick properly. This leads to uneven flooring.
Maintenance Tips
Installing vinyl tiles over linoleum can simplify the renovation process. Ensure the linoleum is clean and flat. Check for any damage or uneven areas before laying the tiles.
Vinyl tiles are a popular choice for flooring. They offer durability and style. Installing vinyl tiles over linoleum is possible. But maintenance is key. Proper care keeps your floors in top shape. Here are some tips to help maintain your vinyl tiles.Regular Cleaning
Regular cleaning preserves the shine of vinyl tiles. Sweep or vacuum your floor weekly. This removes dirt and debris. Use a damp mop for deeper cleaning. Warm water and mild soap work best. Avoid harsh chemicals. They can damage the tiles. Dry the floor after mopping to prevent water spots.Preventing Scratches
Scratches can ruin the look of vinyl tiles. Place felt pads under furniture legs. This reduces friction. Avoid dragging heavy items across the floor. Use rugs in high traffic areas. They provide extra protection. Keep pets’ nails trimmed. This prevents scratches from sharp claws.Repairing Damaged Tiles
Damaged tiles need prompt attention. Minor scratches can be buffed out. Use a vinyl repair kit for deeper scratches. Follow the instructions carefully. Replace tiles that are severely damaged. Matching new tiles with old ones is crucial. It ensures a seamless look.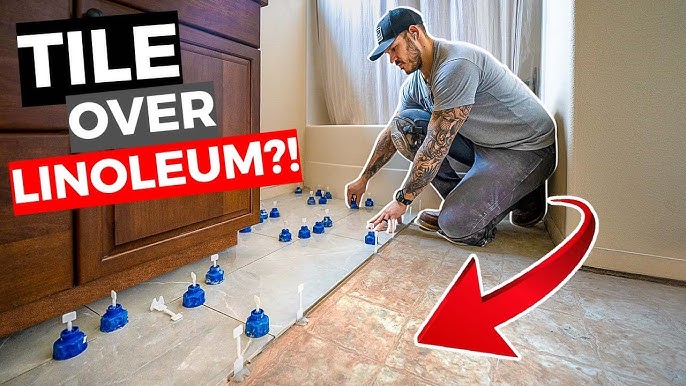
Credit: www.youtube.com
Frequently Asked Questions
Can Vinyl Tiles Go Over Linoleum?
Yes, vinyl tiles can be installed over linoleum. Ensure the linoleum is clean, level, and in good condition. Repair any damages or uneven areas before installation. This provides a smooth surface for the vinyl tiles to adhere properly, ensuring a long-lasting finish.
What Preparation Is Needed Before Installation?
Before installing vinyl tiles over linoleum, ensure the surface is clean and dry. Remove any wax or polish residues. Repair any cracks or damages to create a smooth surface. Use a primer if necessary to enhance adhesion. Proper preparation ensures better results and longevity.
Do I Need Adhesive For Vinyl Over Linoleum?
Yes, using adhesive is recommended when installing vinyl tiles over linoleum. The adhesive ensures the tiles stick properly and remain in place. Follow the manufacturer’s instructions for the best results. Proper adhesive application prevents shifting and increases the durability of the flooring.
Is Leveling Required Before Installation?
Leveling might be necessary if the linoleum surface is uneven. Use a leveling compound to address any dips or bumps. This ensures the vinyl tiles lay flat and adhere properly. A smooth, level surface prevents future issues and enhances the appearance of the finished floor.
Conclusion
Vinyl tiles over linoleum. A practical choice for many homes. Easy to install. Offers a fresh look. Ensures durability and style. Preparation is key. Clean and smooth the surface. Check for moisture issues. Follow the right steps. Save time and effort.
No need for removal of old flooring. Cost-effective solution. A DIY-friendly option. Suitable for various spaces. Enhances your home’s appearance. Consider your needs and preferences. Make an informed decision. Enjoy a refreshed floor. Simple and effective.